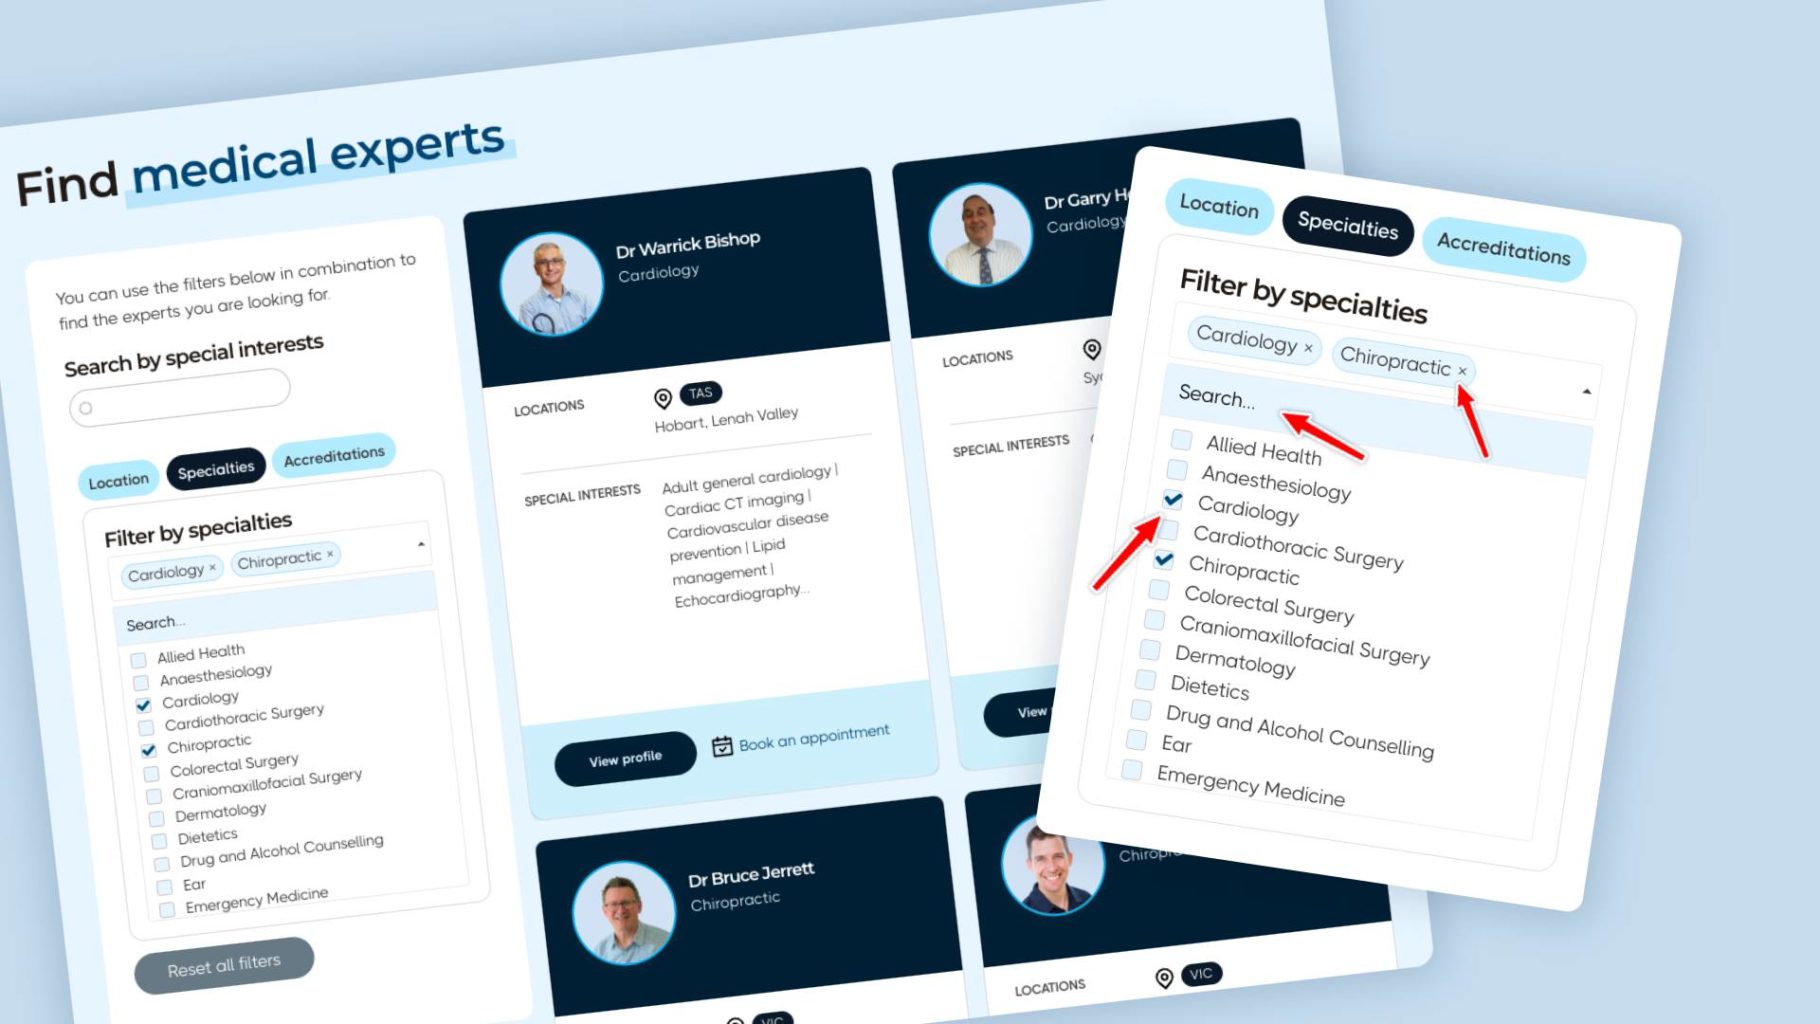
I’m currently rebuilding a website for a client that lists medical experts. They have hundreds of medical experts in their database, each with multiple taxonomies applied to them. I built out the Custom Post Type with Advanced Custom Fields and applied a ‘Specialties’ taxonomy to it. This taxonomy has about 80 terms such as:
- Anaesthesiology
- Cardiology
- Cardiothoracic Surgery
- Chiropractic
- Colorectal Surgery
- Craniomaxillofacial Surgery
- Dermatology
- Dietetics
- Drug and Alcohol Counselling
- Ear
- And many more…
I needed a way for users to be able to filter through this long list without too much hassle. I had the following requirements:
- A fixed height must be applied to the filter list
- List must be scrollable within its container
- Must be able to select multiple term names
- Must order list items in alphabetical order
- Items that have been selected must be easily visible all in one place and not rely on scroll to see again
- Should have a search bar to easily find term names
I first tried WPGridBuilder facets, but first noticed I could not multi-select their checkbox facet, however this turned out to be a simple setting I had to toggle on. The other issue I was having was that it was not ordering the items in alphabetical order when they where child terms. The only one that was I able to use with some success was their button facet. However, since this list was so large, it needed to have an easy way to track selected items without having to scroll so long up and down the page. While I love WPGridBuilder facets, in this case, it was just not meeting all the requirements.
I then installed JetSmartFilters and used the checkbox filter – and it worked beautifully.
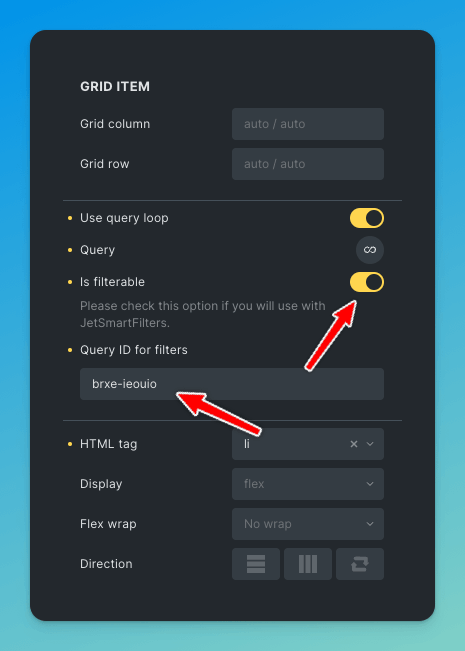
1. Connect Bricks Query Loop with JetSmartFilters
Once you have built out your Query Loop, you need to enable a toggle to ensure it works with JetSmartFilters – see image below. In the Query ID for filters field, you need to insert the Bricks Query Loop element ID.
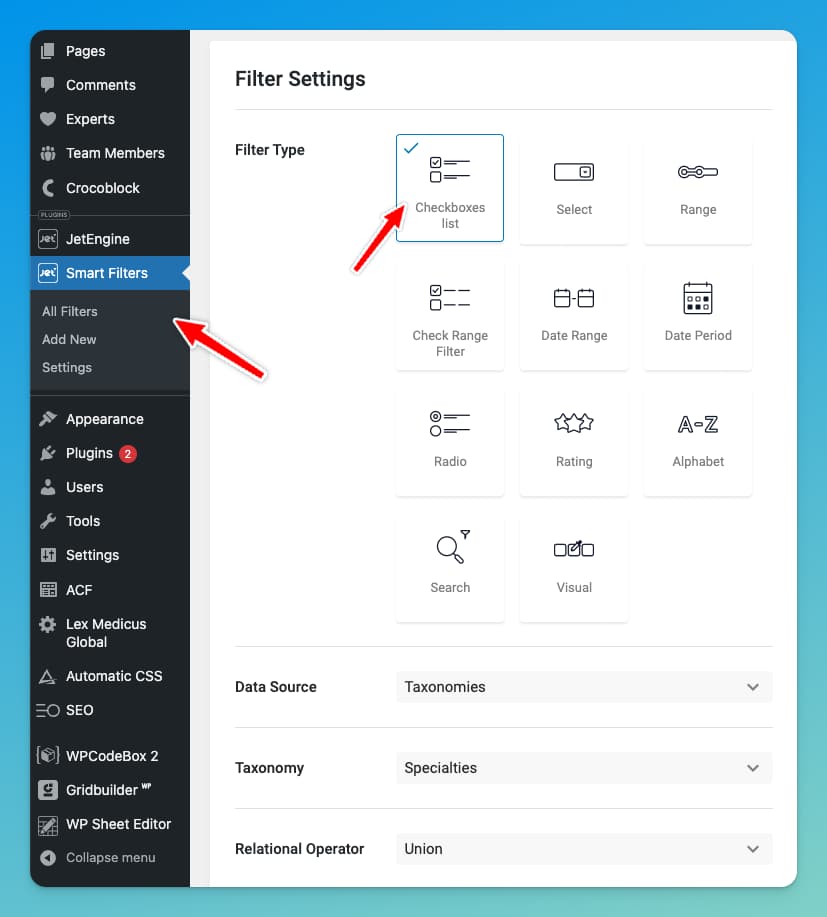
2. Create checkbox JetSmartFilters
This is pretty straightforward, just select all the relevant settings.
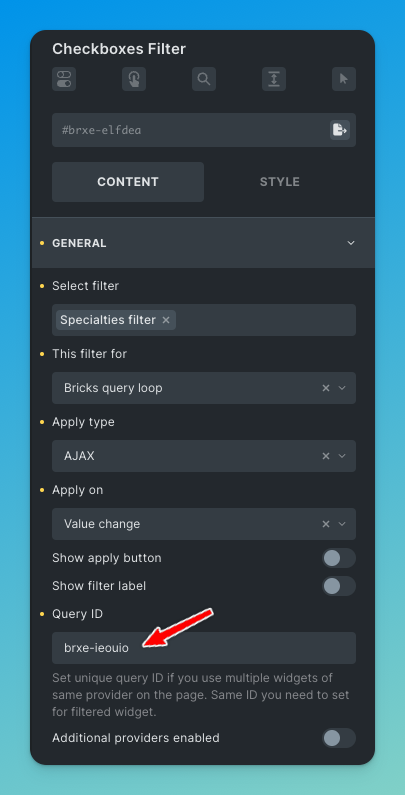
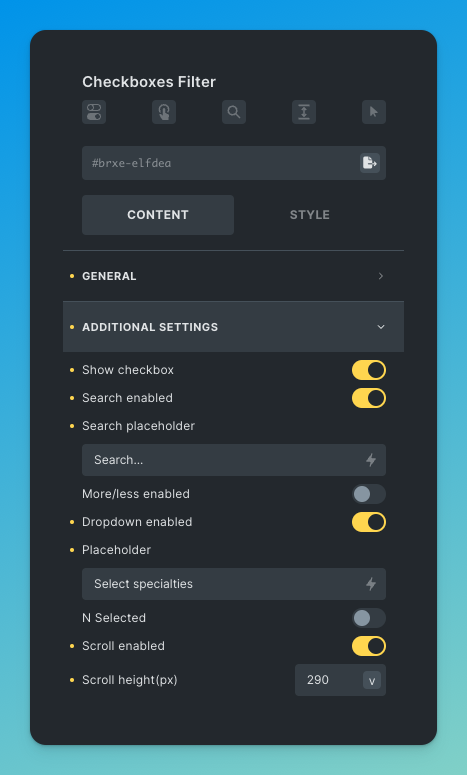
3. Add the checkbox filter to Bricks and connect with Query Loop
Use the settings below – notice that Query Loop ID is set in the general tab.
4. Style with CSS as required
While JetSmartFilters in bricks has some styling controls in the style tab of the builder, it doesn’t have controls for some things, so you may need to style it with some CSS to make it match your website’s style.